South Africa vs Australia, 3rd Test Day 4: Live Score and Updates


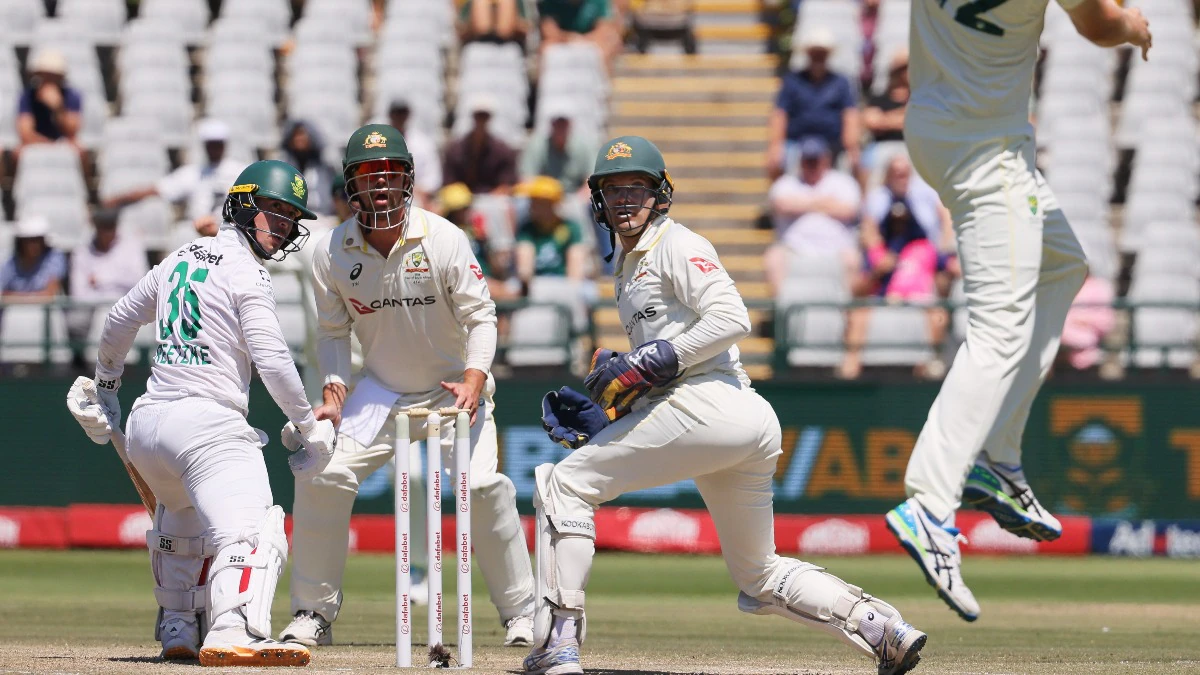
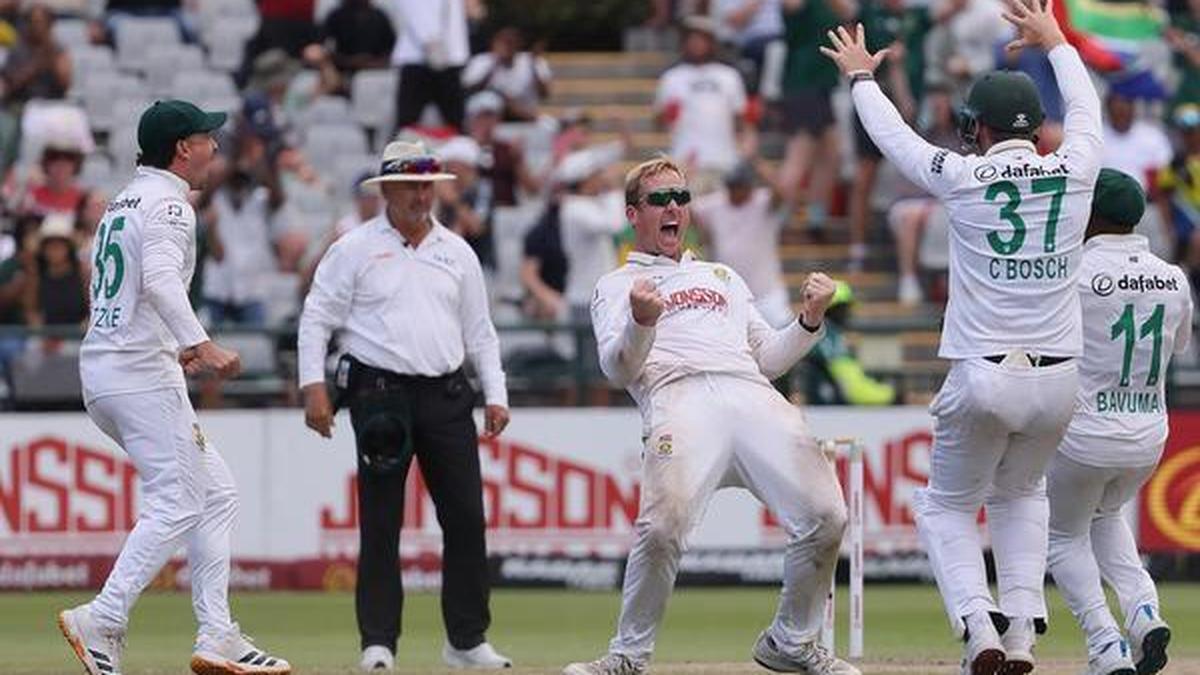
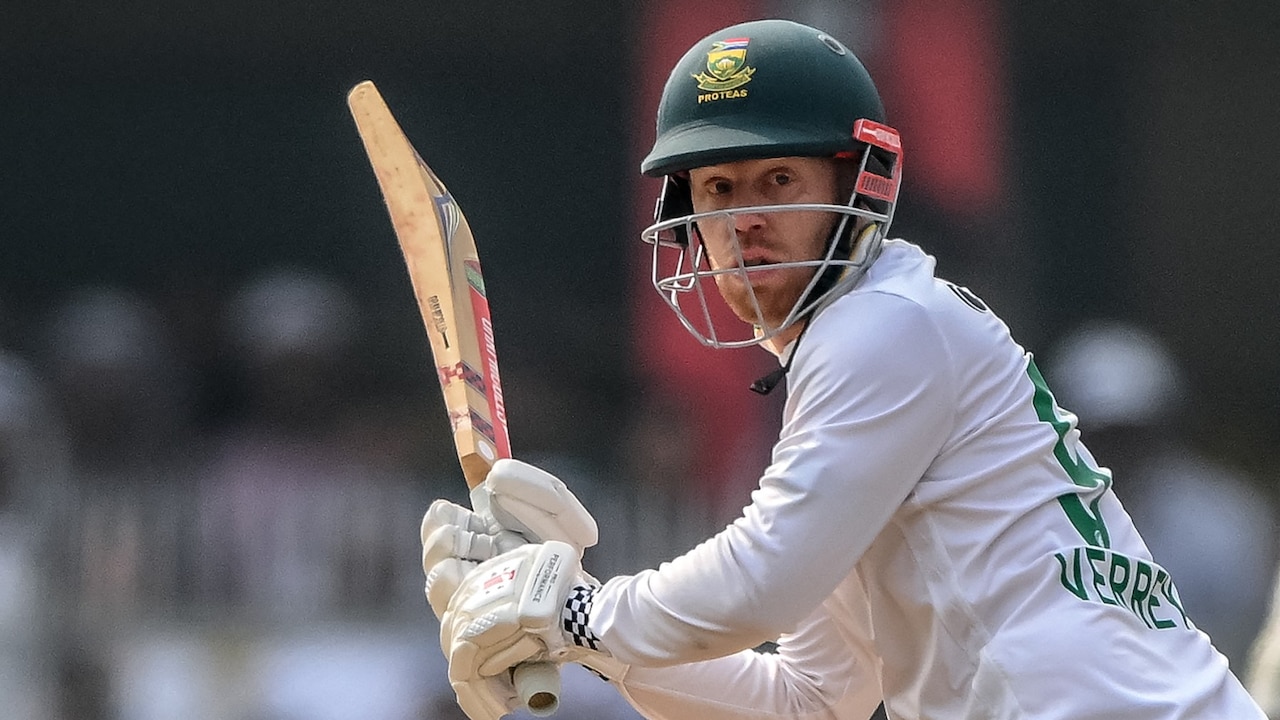
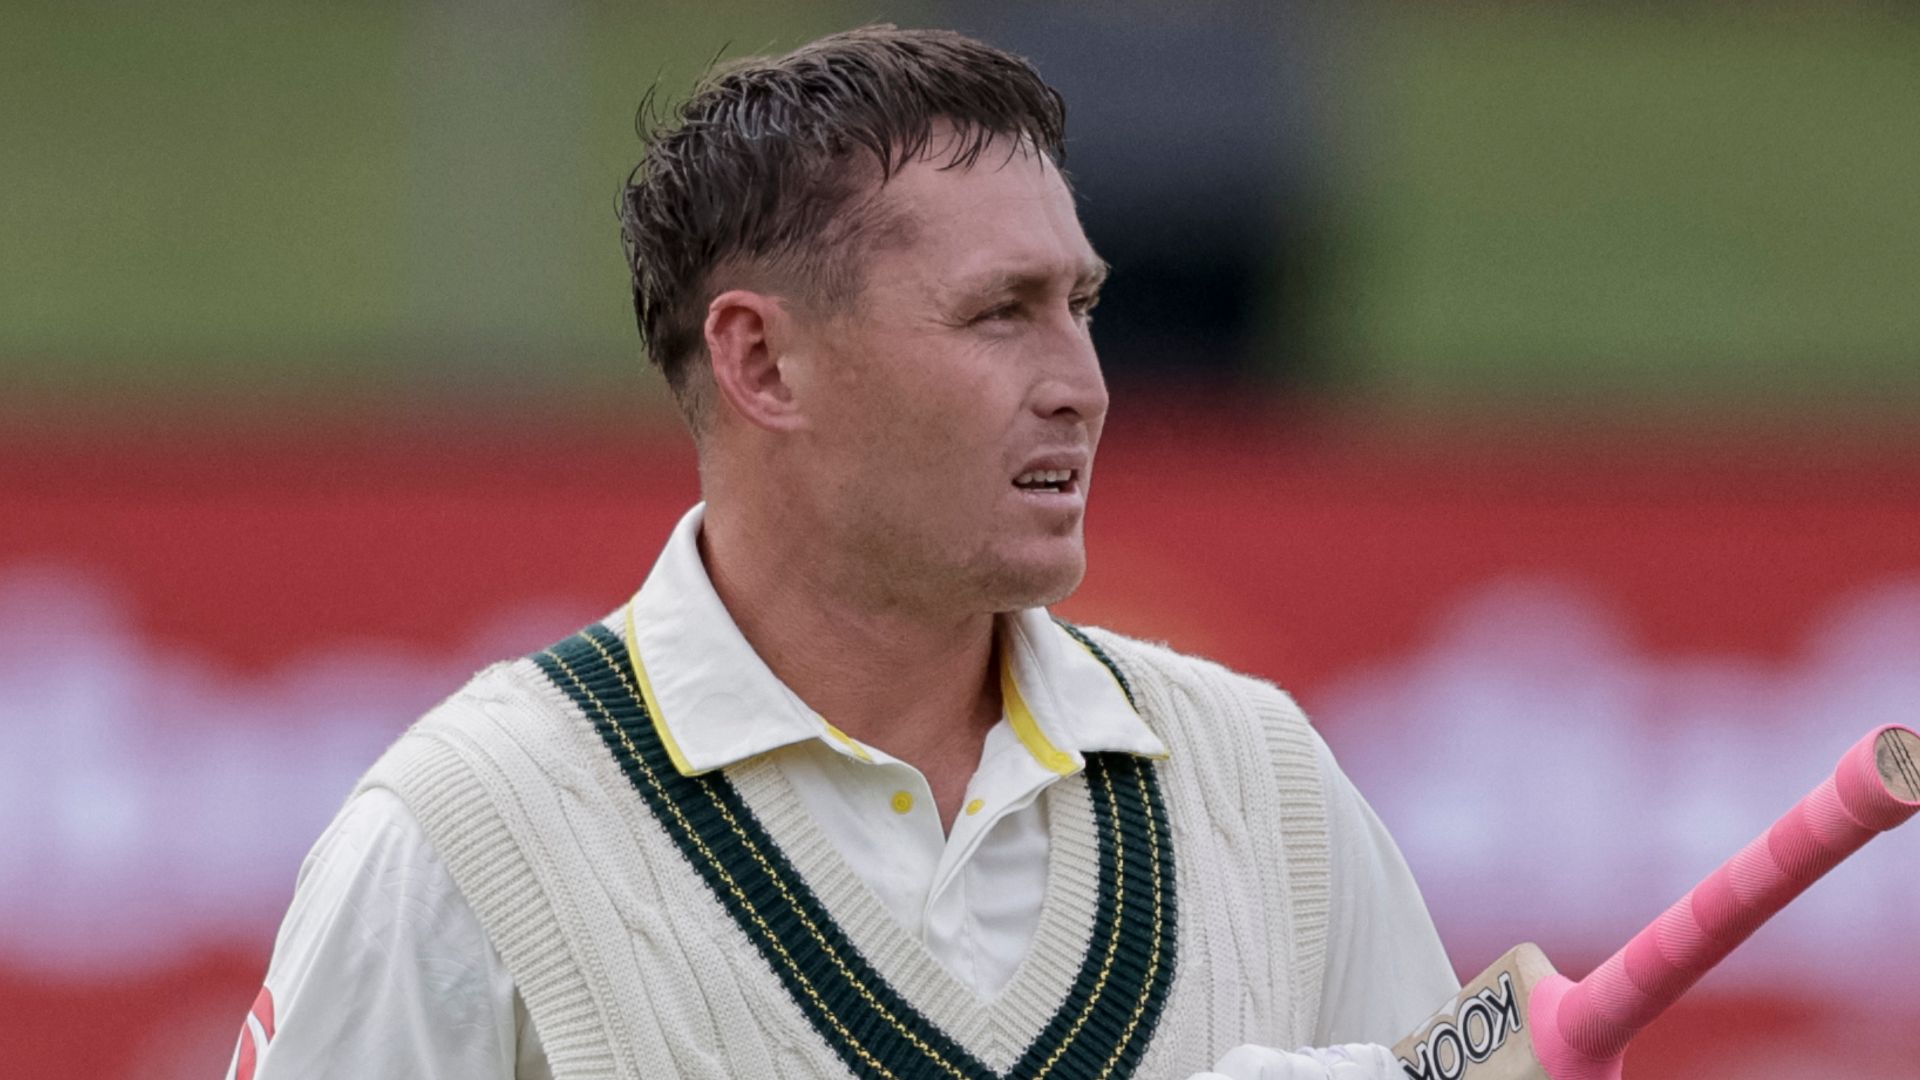
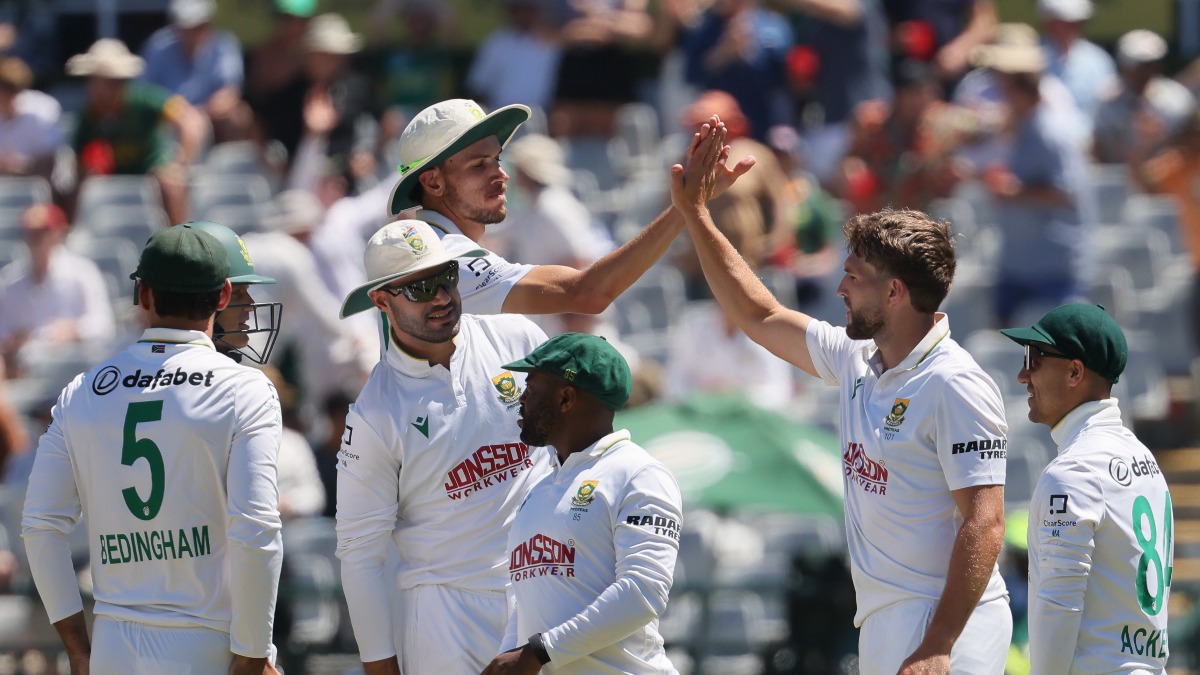
South Africa (SA) vs Australia (AUS) 3rd Test Day 4 Live (AP Photo) Hello and welcome to our live coverage of Day 4 of the third Test between South Africa and Australia from Cape Town. 67.4: Nathan Lyon to Wiaan Mulder, 1 run, the batter has just blocked that from the crease. Gets a run.
South Africa (SA) vs Australia (AUS) 3rd Test Day 4 Live Score and Updates from Cape Town: South Africa resumed Day 4 with a 100-run deficit after being bowled out for 329 in their first innings, with Australia responding with 429, led by Josh Inglis' 102. The hosts reached 180 for 4 at the end of the first session, stretching their lead to 80 runs. Matthew Breetzke and Ryan Rickelton will...Read More
South Africa (SA) vs Australia (AUS) 3rd Test Day 4 Live (AP Photo)
Hello and welcome to our live coverage of Day 4 of the third Test between South Africa and Australia from Cape Town.
67.4: Nathan Lyon to Wiaan Mulder, 1 run, the batter has just blocked that from the crease. Gets a run.
67.3: Nathan Lyon to Wiaan Mulder, On a good length, on off, the batter has just blocked that from the crease.
67.2: Nathan Lyon to Wiaan Mulder, Slightly shorter, on middle and leg. Wiaan turns it away off the hips past square leg and as the ball goes to the deep, the batters collect a couple.
67.1: Nathan Lyon to Wiaan Mulder, Full and around off. Mulder leans forward to block.
66.6: Pat Cummins to Wiaan Mulder, On a back of a length, on middle. Mulder rises with the bounce and tucks it past short leg before taking a single.
66.5: Pat Cummins to Matthew Breetzke, OUT! TAKEN! Can you believe it? The short-ball plan has worked like a charm for Pat Cummins and Australia as the skipper breaks the wicket drought. Another Proteas batter falls to the short ball in this game. Cummins switches to around the wicket and bashes the deck hard, tucking the batter up for room, keeping it around the hip. Breetzke hops and pivots on the back foot. He tries to roll his wrists over the ball but can't get on top of the bounce. It takes the top edge and flies straight down to the throat of Mitchell Starc at deep fine leg, who takes the catch around his waist. Breetzke flings his bat away in disgust.
66.4: Pat Cummins to Matthew Breetzke, Another bumper but at pace now, Breetzke drops his wrists and sways away.
66.3: Pat Cummins to Matthew Breetzke, Out comes the slower short ball, it is the off-cutter, on middle. The ball spins back in towards Breetzke, who hops and fends it down.
66.2: Pat Cummins to Matthew Breetzke, Bowled on a hard length, on off. Breetzke stands tall on top of the bounce to punch it to cover.
66.1: Pat Cummins to Matthew Breetzke, On a back of a length, angled in at the hips. Breetzke swivels for the pull but can't get it away and wears it on the thigh pad.
65.6: Nathan Lyon to Ryan Rickelton, Well, well, that would have been a freakish dismissal. Rearing up off the rough outside the leg stump. Rickelton offers no shot and holds his bat high. The ball spins away to flick the front pad and deflects to hit the back of the bat before dropping well to the right of the silly point fielder.
65.5: Nathan Lyon to Ryan Rickelton, Landing outside the leg stump, Rickelton shoulders arms and lets the ball strike his pads.
65.4: Nathan Lyon to Matthew Breetzke, Fractionally short, on middle and leg. Breetzke goes back in the crease and flicks it behind square leg for a single. That brings up the 50-run stand between these two batters.
65.3: Nathan Lyon to Matthew Breetzke, Shorter in length, outside off. Breetzke shuffles across to dab it down on the off side.
65.2: Nathan Lyon to Matthew Breetzke, FOUR! Hit with absolute authority. Too full from Lyon, and he misses the rough outside the off stump. Breetzke cashes in as he sinks to a knee and nails the slog sweep over deep mid-wicket for a boundary. That takes South Africa's lead to 80.
65.1: Nathan Lyon to Matthew Breetzke, Oh, that could have gone anywhere. Flighted up, on off. Breetzke pushes out in front with hard hands. Gets an inside edge onto the front pad as the ball pops up but lands in front of the bowler.
64.6: Pat Cummins to Ryan Rickelton, Attacking the front pad with a length ball. Rickelton flicks it neatly but picks out the man at mid-wicket.
64.5: Pat Cummins to Matthew Breetzke, At the hips, Breetzke goes back in the crease and helps it away through fine leg for a single.
64.4: Pat Cummins to Matthew Breetzke, With the field set for the short ball, Cummins switches to around the wicket and goes into the surface, over middle. Breetzke drops his wrists and sways away.
64.3: Pat Cummins to Matthew Breetzke, Goes full again, on off. Breetzke firms the drive down the deck. Cummins gets low to make a half-stop and it is parried to mid off.
64.2: Pat Cummins to Matthew Breetzke, FOUR! Nicely driven! Slightly overpitched by Cummins, on off. Breetzke springs onto the front foot and with a high elbow, creams the drive all along the ground between cover and mid off. Matt Renshaw gives chase from mid off before giving up on it. The partnership moves to 44, and the lead is now 75.
64.1: Pat Cummins to Matthew Breetzke, Dug in short, over off, that is left alone for the keeper to collect.
63.6: Nathan Lyon to Ryan Rickelton, Stays short, on leg. Rickelton offers no shot and lets the ball strike his pads.
63.5: Nathan Lyon to Ryan Rickelton, 'Ya, ya,' followed by a loud 'No'. Shorter and on middle. Rickelton dabs it in the vacant short mid-wicket region and takes off for the run before being sent back by his partner and rightly so, as Nathan Lyon was quick to attack the ball on his follow-through.
63.4: Nathan Lyon to Ryan Rickelton, Landing outside leg again, on a good length. Rickelton holds his bat high to pad it away.
63.3: Nathan Lyon to Ryan Rickelton, Switches to over the wicket, aiming for the rough outside the leg stump. This does not turn much as Rickelton lunges ahead to keep it out.
63.2: Nathan Lyon to Ryan Rickelton, Bowled by going wide on the crease, very full at 93.6 kph, on middle. Ryan jams it out.
63.1: Nathan Lyon to Ryan Rickelton, Nice loop and drop, full and on the off pole. Riclelton gets forward to smother the spin.
62.6: Pat Cummins to Matthew Breetzke, In and around the off pole, on a length. Breetzke is solid in defense.
62.5: Pat Cummins to Matthew Breetzke, This is on a back of a length, on off. Breetzke pats it down on the off side.Josh Inglis shows off his footballing skills at cover with a few neat touches.
62.4: Pat Cummins to Matthew Breetzke, Delivers it on the fuller side. Breetzke plays it right under his eyes as he angles it wide of cover. Another good effort in the field,this time by Josh Inglis, who tumbles away to his left to prevent the single.
62.3: Pat Cummins to Matthew Breetzke, Straightening off a good length, around off. Breetzke presents a straight bat to block it out. It goes down off the outside edge and wide of gully. They think about a single, but Cameron Green slides to his right and denies the run.
62.2: Pat Cummins to Matthew Breetzke, A bit fuller, in the channel. Breetzke taps it to cover.
62.1: Pat Cummins to Matthew Breetzke, Hits the good length, on off. Breetzke stabs it down the deck.
DRINKS BREAK!South Africa have ticked the box of getting through the first hour without losing a wicket, adding 31 runs to their overnight score in the process. The ball is now 62 overs old and has lost much of its bite, with not a great deal happening for the pacers.Nathan Lyon, though, continues to ask questions from the rough, particularly to the right-handed Matthew Breetzke. There hasn't been quite as much for him to work with against the left-handed Ryan Rickelton, who has looked more comfortable so far.A steady start for the Proteas, who will now look to build on it. Pat Cummins to bowl after the break.
61.6: Nathan Lyon to Ryan Rickelton, Flat and short, outside off, the batter is not interested in playing at that.
61.5: Nathan Lyon to Ryan Rickelton, A lot quicker, full and on off. Rickelton pushes it to cover.
61.4: Nathan Lyon to Ryan Rickelton, Full and on middle. Rickelton clips it to mid-wicket.
61.3: Nathan Lyon to Matthew Breetzke, A teaser for Cameron Green! Landing on the rough and spitting back in sharply, Breetzke lunges across, but the ball drops on him, and it kicks up off the rough to graze the back thigh before popping up off the keeper's thigh. Green leaps high at leg slip but the ball sails over his head. They cross.
61.2: Nathan Lyon to Matthew Breetzke, Sticks to the full length, on middle. Breetzke flicks it to mid-wicket.
61.1: Nathan Lyon to Matthew Breetzke, Full and pushed through, on off. Breetzke defends it out off the front foot.
60.6: Cooper Connolly to Matthew Breetzke, A productive over for South Africa, 9 runs off it. Dropped short, on off. Breetzke punches it wide of cover and sets off for the single. Rickelton is a bit late to respond but luckily for him, Josh Inglis fumbles to pick the ball up, letting it through his legs. A clean pick-up could have made it interesting.
60.5: Cooper Connolly to Ryan Rickelton, Shortens his length, on middle. Ryan uses the depth of the crease to punch it to long and gets to the other end.
60.4: Cooper Connolly to Matthew Breetzke, Flighted up, on off. Breetzke gets forward and eases it to long off for one more run.
60.3: Cooper Connolly to Ryan Rickelton, Slow turn off the deck, on a nagging length, on middle. Rickelton tucks it through square leg for a single.
60.2: Cooper Connolly to Matthew Breetzke, Stays short, on off. Breetzke forces it down to long off for one.
60.1: Cooper Connolly to Matthew Breetzke, FOUR! Put away! A loosener by Connolly, this is dragged down, on off.Breetzke needs no second invitation as he rocks onto the back foot and spanks it away past the diving cover fielder, leaving the fielder in the deep with no chance of cutting it off.
It will be spin from both ends as Cooper Connolly comes on.
59.6: Nathan Lyon to Ryan Rickelton, Slows it down and draws the batter forward. Rickelton gets forward to smother the spin.
59.5: Nathan Lyon to Ryan Rickelton, Flatter and on a good length, on middle. Rickelton is solid in defense.
59.4: Nathan Lyon to Ryan Rickelton, Tossed up, on off, that is defended solidly off the front foot.
59.3: Nathan Lyon to Ryan Rickelton, Missed out. A rare loose ball by Lyon, short and angled in at the hips. There to be helped away for Rickelton but he misses and gets hit on the thigh pad.
59.2: Nathan Lyon to Ryan Rickelton, Nearly trapped in front. Not all that short, and it slides on with the arm whilst staying low. Rickelton presses back and tries to clip it away with a closed bat face. Just about manages to get an inside edge onto the pads.
59.1: Nathan Lyon to Ryan Rickelton, Drifting in, attacking the front pad with a full ball. Rickelton brings his bat out in front to deal with it.
58.6: Josh Hazlewood to Matthew Breetzke, A bit of reverse on that ball, on a good length, on off. Breetzke covers the line, presents a straight bat and blocks it out.
58.5: Josh Hazlewood to Ryan Rickelton, Serves it on a length, outside off. Rickelton uses the pace of the ball to run it down to deep third for a run.
58.4: Josh Hazlewood to Matthew Breetzke, Seam-up ball, on a good length, outside the off stump.Breetzke opens the bat face slightly and punches it to deep point for a single. The lead is now 60.
58.3: Josh Hazlewood to Matthew Breetzke, Bashes the hard length, on off. Breetzke drops his wrists and arches back.
58.2: Josh Hazlewood to Matthew Breetzke, At 135.4 kph, banged in short, over off. Breetzke thinks about going after it but then withdraws his bat and sways away from the line of the ball.
58.1: Josh Hazlewood to Matthew Breetzke, On a back of a length, on off. Breetzke defends it from the crease.
57.6: Nathan Lyon to Ryan Rickelton, Landing outside the line of the leg stump, on a length. Rickelton pads it away.
57.5: Nathan Lyon to Matthew Breetzke, Full and wide on off. Breetzke reaches across and drives this through point for a run.
57.4: Nathan Lyon to Matthew Breetzke, A prolonged appeal for LBW, but the umpire is unmoved. The men around the bat are interested because Matthew Breetzke did not offer a shot but with only one review remaining, Pat Cummins does not take a chance. Bowled full and outside off. Breetzke lunges across and pads it away. Given the stride that Breetzke took, the ball might have spun past the leg stump and the height also seemed to be an issue there.
57.3: Nathan Lyon to Matthew Breetzke, Floated up, fuller and landing in the rough. Breetzke gets a big stride in to smother the spin but it spins back in to go past the inside edge and rap him on the front pad.
57.2: Nathan Lyon to Matthew Breetzke, Turn and bounce. Shorter and on off. Breetzke rocks back to deal with it but the ball spins back to go past the bad and pops up to short leg. Half a shout but it is turned down.
57.1: Nathan Lyon to Matthew Breetzke, Oh, hello! Dropped short by Lyon, coming out off the rough, spinning back in sharply. Breetzke shapes up for the cut but gets tucked for room due to the prodigious turn. He chops it down the strip.
56.6: Josh Hazlewood to Ryan Rickelton, In the channel, on a length. Rickelton leans across to stab it down on the off side.
56.5: Josh Hazlewood to Ryan Rickelton, Digs it in short, but it is a little too straight, around leg. Rickelton ducks under it.
56.4: Josh Hazlewood to Ryan Rickelton, In line with the off stump, Rickelton knocks this full ball back to Hazlewood.
56.3: Josh Hazlewood to Ryan Rickelton, Nice and tight, on a good length, around the off stump. Rickelton defends close to his body.
56.2: Josh Hazlewood to Ryan Rickelton, Pushes the length up, on the off stump. Rickelton pushes out in front but cuts across the line of the ball. The ball seams away a touch as Ryan slices it off the outer half to cover.
56.1: Josh Hazlewood to Ryan Rickelton, Hurls it on a back of a length, on off. Ricketlon gets right behind the line and pats it down the deck.
55.6: Nathan Lyon to Matthew Breetzke, That in-between length, turning back in, on middle. Breetzke is a bit indecisive with his footwork initially before rocking back and dropping it down in front of short leg.
55.5: Nathan Lyon to Matthew Breetzke, A bit short, on off. Breetzke plays it back to the bowler.
55.4: Nathan Lyon to Matthew Breetzke, At 87 kph, full and on off. Breetzke defends with the bat close to the front pad.
55.3: Nathan Lyon to Ryan Rickelton, Drags the length back, on off. Ryan goes back and punches it from the crease to the left of deep point for a run.
55.2: Nathan Lyon to Ryan Rickelton, Hangs it up, full and wider on off. Rickelton covers the off stump as the ball spins away sharply with a puff of dust.
55.1: Nathan Lyon to Ryan Rickelton, Oohs and aahs around the bat. A hint of turn from the off stump line. Rickelton is drawn forward to defend. It spins away to squirt off the outside edge to point.
54.6: Josh Hazlewood to Matthew Breetzke, Targeting the top of off. Breetzke taps it beside the strip on the off side from the crease. First half hour safely negotiated by South Africa and their lead stands at 57.
54.5: Josh Hazlewood to Ryan Rickelton, Slanting in at the hips. Rickelton presses up on his toes and nudges it wide of mid-wicket for one.
54.4: Josh Hazlewood to Ryan Rickelton, At 137.9 kph, outside off, on a good length. Rickelton reaches across and drives it on the rise to cover.
54.3: Josh Hazlewood to Ryan Rickelton, Goes full now, does Hazlewood. Ricketlon plays the ball with soft hands. It goes more off the outer half to the right of deep point for a brace.
54.2: Josh Hazlewood to Ryan Rickelton, Bowled by going slightly wide on the crease, in line with the off stump, on a good length. Rickelton presents a straight bat to defend.
54.1: Josh Hazlewood to Ryan Rickelton, Begins from around the wicket with a full ball, around the off stump. Rickelton knocks it to cover from the crease.
53.6: Nathan Lyon to Matthew Breetzke, Stays around the wicket for the right-hander, slightly short, on middle. Breetzke deals it with it off the back foot as he drops it down the deck.
53.5: Nathan Lyon to Ryan Rickelton, Flighted up, on the fuller side, on middle and leg. Rickelton wrists it off the pads wide of mid-wicket and rotates the strike.
53.4: Nathan Lyon to Ryan Rickelton, Shorter and angled in, on middle. Rickelton tucks it down on the bounce to short leg.
53.3: Nathan Lyon to Matthew Breetzke, A bit quicker at 91.6 kph, very full.Breetzke squeezes it out in front of mid on, where Josh Hazlewood is caught on his heels and the batters sneak in a quick single. A quiet word from the umpire to Breetzke for running in the danger area.
53.2: Nathan Lyon to Ryan Rickelton, Slightly slower and shorter, turning away. Ryan punches it off the back foot to deep point for a single.
53.1: Nathan Lyon to Ryan Rickelton, At 90.1 kph, on a length, outside off. Rickelton goes deep in his crease and makes the leave.
52.6: Mitchell Starc to Matthew Breetzke, And again, words exchanged between Starc and Breetzke. On a back of a length, on off. Matthew pats it down on the off side from the crease.
52.5: Mitchell Starc to Matthew Breetzke, Out comes the bumper at 141 kph, going over the left shoulder.Breetzke ducks underneath it and, while crouching, has a word or two to say to Starc, even sticking his tongue out as he gets back up. A bit of needle between the two!
52.4: Mitchell Starc to Matthew Breetzke, Hits the back of a length, on off. Breetzke rides the bounce and guides it to point.
52.3: Mitchell Starc to Matthew Breetzke, Switches to around the wicket and goes full, outside off, that is left alone for the keeper to collect.
52.2: Mitchell Starc to Matthew Breetzke, Bends his back and digs it in short, over off.Breetzke ducks under it.
52.1: Mitchell Starc to Matthew Breetzke, Angled across the off stump, on a length. Breetzke is not interested in playing at that.
51.6: Nathan Lyon to Ryan Rickelton, Bowled on a length, drifting in, on middle. Rickelton brings his bat out in front to dead-bat it.
51.5: Nathan Lyon to Ryan Rickelton, Keeps the stumps in play and the length is full. Ryan lunges for the block.
51.4: Nathan Lyon to Ryan Rickelton, Full and fired in at 88.9 kph, on middle. Rickelton blocks it out with the bat close to the front pad.
51.3: Nathan Lyon to Ryan Rickelton, A bit too full, on middle. Rickelton clips it to mid-wicket.
51.2: Nathan Lyon to Ryan Rickelton, FOUR! First boundary of the day. A bit short, on off. Rickelton picks up the length quickly and gets on top of the bounce. Punches it past the diving cover fielder. The fielder in the deep sprints and dives to his left but in vain. South Africa go past 150 and the lead is now 51.
51.1: Nathan Lyon to Ryan Rickelton, Fractionally short, on off, not much turn. Rickelton rocks back to defend it down.
50.6: Mitchell Starc to Matthew Breetzke, This is a lot fuller, angled away. Breetzke shoulders arms.
50.5: Mitchell Starc to Matthew Breetzke, Going away, on a short of a length. Breetzke lets the ball come on and defends it late, close to his body. Gets a bit of an inside edge as the ball drops at his feet. They think about a single but Nathan Lyon swoops in from cover.
50.4: Mitchell Starc to Matthew Breetzke, Pushes the length up, on off. Breetzke crouches and leans into the drive. He drives it firmly but picks out the cover fielder.
Mitchell Starc has a word with Richard Kettleborough, possibly raising concerns about the landing area.
50.3: Mitchell Starc to Ryan Rickelton, On a back of a length, angled in before straightening a touch off the deck. Rickelton stays back to block it out. It goes off the outer half behind point for a single.
50.2: Mitchell Starc to Ryan Rickelton, A bouncer now, ducked under.
50.1: Mitchell Starc to Ryan Rickelton, Hurls it on a back of a length, on off. Rickelton defends it from the crease.
49.6: Nathan Lyon to Matthew Breetzke, First sign of intent from Breetzke this morning. Looped up, landing on the rough outside the off stump. Breetzke has a swing at it, looking to swipe it with the spin. The bat turns in his hand and he mishits it to the left of deep square leg for a couple of runs. The lead goes up to 46.
49.5: Nathan Lyon to Matthew Breetzke, Flat and short, on middle. Breetzke deals it with from the crease as he dead-bats it.
49.4: Nathan Lyon to Matthew Breetzke, Prodigious turn, on the shorter side, on off and middle. Breetzke hangs back to dab it beside the strip on the leg side.
49.3: Nathan Lyon to Matthew Breetzke, Flighted up, on off. Breetzke gets a good stride in and defends it out.
49.2: Nathan Lyon to Ryan Rickelton, Had to hurry! Slanting into the left-hander, fuller and on middle. Rickelton presses forward and tucks it wide of mid-wicket for a quick single. Nathan Lyon tries to attack the ball himself, and that results in Breetzke having to go around the off-spinner. Matthew puts the afterburners on and dives to get home before the throw arrives. Even with a direct hit, the dive would have saved Breetzke.
49.1: Nathan Lyon to Ryan Rickelton, Bowled with a flat trajectory, fractionally short, outside off. Rickelton shuffles across and covers the off stump to make the leave.
48.6: Mitchell Starc to Matthew Breetzke, A little too wide, on a back of a length. Breetzke is happy to let it go.
48.5: Mitchell Starc to Ryan Rickelton, Pulls the length back, on off. Rickelton stands tall on top of the bounce and punches it square to deep point for one.
48.4: Mitchell Starc to Ryan Rickelton, Honing in on the off stump, on a nagging length. Rickelton stabs it down the deck with a straight bat.
48.3: Mitchell Starc to Matthew Breetzke, Bangs it in short, over the left shoulder. Breetzke hops and swivels to roll his wrists over the ball and play the pull behind square leg. The ball gets a bit big on him and he is also rushed. Spoons it towards square leg for a single.
48.2: Mitchell Starc to Matthew Breetzke, A good-length delivery but not close enough to make the batter play, that is left alone for the keeper to collect.
48.1: Mitchell Starc to Matthew Breetzke, Pushed across the off stump, on a good length. Breetzke is not interested in playing at that.
Mitchell Starc will steam in from the other end. He is starting with a slip and a gully.
47.6: Nathan Lyon to Ryan Rickelton, A bit quicker as this is pushed through, on middle and leg. Rickelton keeps it out on the leg side.
47.5: Nathan Lyon to Ryan Rickelton, Around the off stump, on a length. Rickelton lunges and smothers the spin.
47.4: Nathan Lyon to Ryan Rickelton, Drifting in, keeping the stumps in play. Ryan gets forward to block it out.
47.3: Nathan Lyon to Ryan Rickelton, From around the wicket now for the left-hander, full and on at the sticks. Rickelton pushes it back to the bowler.
47.2: Nathan Lyon to Matthew Breetzke, A bit of air given now, wider on off. Breetzke strides across, keeping the bat close to the front pad. He pushes it towards cover for a single.
47.1: Nathan Lyon to Matthew Breetzke, Floated up, on the off stump, that is defended solidly off the front foot.
We are all set to get going. It is yet another sunny morning, with bright blue skies overhead, and conditions are looking pleasant at Newlands. Pat Cummins and his men take the field. They are followed by Matthew Breetzke and Ryan Rickelton. Australia are starting with spin through Nathan Lyon. Breetzke is on strike. A slip, a leg slip, a silly point, and a short leg in place. Let's go...
PITCH REPORT -Simon Katich points out that the two left-arm quicks (Starc and Jansen) have created plenty of rough outside the off stump of the right-handers. That could prove significant as the Test progresses, giving the spinners a good area to work with.Mark Nicholas brings up an interesting statistic, noting that since 2021, Newlands has produced more turn on average than any other ground in South Africa. He adds that the amount of turn has increased with each passing innings in this Test, suggesting the surface is beginning to offer more assistance to the spinners.Shaun Pollock feels there are no major concerns when it comes to facing the fast bowlers, but the spinners have plenty to work with.
A quick chat with Marques Ackerman -Marques admits it is a pity he couldn't kick on in either innings, especially after getting himself set. He feels it was a tough wicket to get in on, but batting became easier as the innings progressed. He also acknowledges that this is a big day for the batters.Looking ahead, Ackerman feels the biggest challenge will be the dryness of the pitch and the assistance it could offer Nathan Lyon against the right-handers. He believes it may not be quite as difficult for the left-handers, which makes Ryan Rickelton an important player for South Africa.He also talks about the delivery from Mitchell Starc that led to his dismissal. He saw the ball a little wider and was looking to go over the slip cordon, but it angled back into him and left him in an awkward position. The blow rattled him a little, and he wasn't sure whether the ball had taken the bat before hitting his helmet. He had a word with Bavuma, who encouraged him to go for the review, and the timer on the big screen had a second left.He feels they have an excellent chance of getting right back into the contest if they can bat through two sessions. It will take plenty of grit and one or two substantial partnerships, but he believes the opportunity is there.
Let's hear from the centurion -Mark Howard has caught up with Josh Inglis. Josh feels it was a pretty good day for Australia overall, although they would have liked to add a few more runs in the first innings. He believes getting Temba Bavuma late in the day was a huge moment for them.Reflecting on his innings, Inglis says he came in at the fall of a couple of quick wickets and that building a partnership with Alex Carey was key. He describes the stand as one that ebbed and flowed. On batting with Alex Carey, Inglis says Carey does not say too much, and they just looked to keep the partnership rolling.Inglis also talks about his journey in the Test setup, having been around the squad for 4 or 5 years without getting too many opportunities. He says you always have to prepare as if you are going to play, and that proved important this time. He found out on the morning of the first day that he was in the XI, although the possibility had been lingering for a couple of days, so he had already started preparing for the chance.
The calm before the storm -The roller might flatten things out a bit and make batting easier for the first hour or so. But once its effect wears off, the wearing surface could start asking tougher questions.With the footmarks coming into play and the spinners likely to have a bigger say, all those little battles within the bigger contest make for an intriguing day ahead.
Where things stand -South Africa started their second innings 100 behind, so 140/4 is effectively 40 for 4.Given the trouble Nathan Lyon has already caused with the footmarks, along with the puff of dust coming off the surface, a lead of around 200 could make things very interesting.If the Proteas can get there, Simon Harmer will have a real opportunity to make life difficult for the Australian batters. South Africa's batting depth, with contributions possible right down to number 9, is a definite plus in that regard.
Here we go -If you have been following this series, you will know it does not like to stick to a script. Whenever one team has looked comfortable, the other has found a way back, and the momentum has kept swinging. Day 4 could be the one that tips it, so hop in and join us for the ride.
A defining day awaits -South Africa have a massive task ahead if they are to keep their dream of becoming the number one ranked Test team alive. Ryan Rickelton and Matthew Breetzke are currently holding the fort for the Proteas, who have 6 wickets in hand and a lead of 40 runs. The hosts will be eager to set Australia a substantial target, but much will depend on how well the middle and lower order negotiate the Aussie bowling.Day 4 promises plenty of spice, and the opening exchanges could offer a telling glimpse of where this gripping Test is headed. Join us at 8.30 am GMT as the action resumes. Cheers!
Ackerman fought back bravely!South Africa's second innings got off to a shaky start after conceding a 100-run lead, with Aiden Markram and David Bedingham falling cheaply after playing loose shots. Marques Ackerman, however, brought a refreshing sense of purpose to the crease, taking the attack to the bowlers on his way to a valuable 62. He had a slice of luck on 33, surviving a run-out chance just before Tea, but couldn't make much use of that reprieve.His 64-run partnership with Temba Bavuma helped South Africa claw back most of the deficit, but the hosts still had work to do. For the record, South Africa were three down before they could completely erase the deficit, as Mitchell Starc produced a snorter to send Ackerman packing.
Harmer halted the charge -Simon Harmer stepped up in the morning when South Africa needed him most on Day 3, striking twice to remove the well-set Josh Inglis and Alex Carey. Those crucial breakthroughs prevented Australia from running away with the game and stretching their advantage to potentially match-defining proportions.The Proteas still conceded a 100-run lead, but Harmer's timely intervention ensured the contest remained within reach. On a surface offering increasing assistance to the spinners, his double strike could yet prove significant.
Advantage Australia!Day 3 began with Australia holding a one-run lead and six wickets still in hand. The visitors came a long way since their fortunes began to turn around after Lunch on the opening day. They continued to seize the momentum, with Josh Inglis leading the charge through a magnificent century and a crucial partnership with Alex Carey. The lower order then chipped in with valuable runs, stretching the lead to 100 and putting Australia in front.
A gripping Test battle -This Test is tantalisingly poised, although Australia just have the edge at this stage. However, there is a significant caveat. The surface is deteriorating and beginning to offer appreciable bite to the spinners, which could make batting in the fourth innings a daunting proposition. There is still plenty to play for, and with two days remaining, this contest is shaping up for a mouthwatering finish.
Lyon landed late blow!Wow, talk about a heart-pounding finish to the day! With the close approaching, Temba Bavuma and Matthew Breetzke would have been hoping to see off the remaining overs and head back to the dressing room unscathed. But Nathan Lyon had other ideas. He breached Bavuma's defense for the second time in this Test, dismissing him for the seventh time in the format and delivering a body blow to South Africa just when they seemed poised to close out the day. A late twist that has left the Proteas with plenty to ponder.
46.6: Mitchell Starc to Ryan Rickelton, Safely kept out, and that will be Stumps on Day 3 with South Africa leading by 40 runs. Starc gets the ball to tail back in a bit, on a short of a length, on middle. Rickelton gets right behind the line of the ball and blocks it out from the crease.
46.5: Mitchell Starc to Ryan Rickelton, In line with the off pole, on a good length. Rickelton defends it right under his eyes.
46.4: Mitchell Starc to Ryan Rickelton, Not close enough to make the batter play, on a back of a length. Ryan lets it be.
46.3: Mitchell Starc to Ryan Rickelton, FOUR! Uppish but safe. Angled in at the pads, on a good length. Rickelton closes the bat face to flick it away. Travis Head is standing a bit deep at short leg but the ball is past him before he can react and it races away to the fence.
46.2: Mitchell Starc to Ryan Rickelton, A bouncer now, on middle, ducked under by Rickelton.
46.1: Mitchell Starc to Matthew Breetzke, This is on a back of a length, on off. Breetzke punches it through covers and takes a single as the ball rolls to deep.
Time for the final over of the day. Mitchell Starc to bowl.
45.6: Nathan Lyon to Ryan Rickelton, FOUR! Off the edge. Ryan Rickelton had his heart in his mouth for a moment there. Slightly shorter, on off. Rickelton hangs back to defend. The ball rips away to take the outside edge but it goes down and bounces through the tiny gap between slip and gully for a boundary.
South Africa suffer a cruel blow. Ryan Rickelton makes his way out to bat with about 2 minutes left in the day. A slip, a leg slip, a silly point and a short leg for the new batter.
45.5: Nathan Lyon to Temba Bavuma, OUT! CASTLED!A dagger to the hearts of South Africa in the dying embers of the day. Not sure if the presence of silly point had anything to do with Bavuma playing that shot, but Lyon has the prized scalp. This is floated up, landing on the footmarks outside the off stump. Bavuma springs onto the front foot and brings his wrists into play to flick it with the spin. The ball lands on the rough and spins back in a long way to go past the inside edge, and it clips the top of the leg stump. Nathan Lyon lets out a roar of delight, as do the rest of the men around the bat. Australia pick up a massive wicket late in the day. South Africa are now 4 down with a lead of 31 runs.
45.4: Nathan Lyon to Temba Bavuma, This is dropped short, on off. Bavuma picks up the length early and goes deep in the crease. He makes a bit of room and punches it to the right of deep point for a couple of runs.
Travis Head comes in at silly point. So there is a slip, a short leg and a silly point.
45.3: Nathan Lyon to Temba Bavuma, Tossed up, on a good length, on off. Temba tucks it down with the spin in front of short leg.
45.2: Nathan Lyon to Temba Bavuma, Flighted delivery at the sticks, not much turn. Bavuma nudges it to mid-wicket.
45.1: Nathan Lyon to Temba Bavuma, From around the wicket, full and on middle. Bavuvma works it off the pads to mid-wicket.
44.6: Mitchell Starc to Temba Bavuma, After pushing the batter back with the short ball, Starc goes full this time, wider as well. Bavuma reaches out and slices it behind point for a single.
44.5: Mitchell Starc to Temba Bavuma, Dug in short, over off. Not high enough to trouble the batter as Bavuma rises on his toes and gets his hands high to drop it down the deck with an angled bat.
44.4: Mitchell Starc to Temba Bavuma, Stays around the wicket for Temba. This is full, in and around the off stump. Bavuma does not move his feet much as he pushes it to cover.
44.3: Mitchell Starc to Matthew Breetzke, At 140.8 kph, keeps it full and the line is closer to the off stump. Breetzke pushes slightly away from his body and angles it to deep backward point for one.
44.2: Mitchell Starc to Matthew Breetzke, Switches to around the wicket and serves it full and wide on off.Breetzke is not interested in playing a shot.
44.1: Mitchell Starc to Matthew Breetzke, Pushed across off, on a good length.Breetzke stabs it down from the crease.
With about 12 minutes left in the day, Mitchell Starc comes on for one final burst.
43.6: Nathan Lyon to Temba Bavuma, The length is pulled back, on off. Bavuma hangs back to defend.
43.5: Nathan Lyon to Temba Bavuma, Keeps it full, on off. Bavuma goes hard on the drive again but finds the man at mid off.
43.4: Nathan Lyon to Temba Bavuma, Loopy ball, inviting the drive with no one present at cover. Temba accepts the invitation and goes for it but the bat turns in his hand and he mistimes the stroke to mid off.
43.3: Nathan Lyon to Temba Bavuma, This does not turn much, full and on off. Bavuma clips it with a closed bat face to mid-wicket.
43.2: Nathan Lyon to Temba Bavuma, Slower and a bit of air given, full and outside off. Bavuma lunges across and blocks it with soft hands.
43.1: Nathan Lyon to Temba Bavuma, Flat and full, on off. Bavuma defends it with the bat close to his front pad.
42.6: Josh Hazlewood to Matthew Breetzke, Nice and full with a man at a silly mid on. Breetzke works it to Cameron Green there with a straight bat.
42.5: Josh Hazlewood to Matthew Breetzke, Tighter line, closer to the off stump but the length stays full. Breetzke plays it back to the bowler.
42.4: Josh Hazlewood to Matthew Breetzke, FOUR! Gloriously driven. Full, but Hazlewood offers width. Breetzke leans into the stroke and drives it square of the wicket on the off side. Cooper Connolly covers good ground to his right in the deep and dives, but in vain.
42.3: Josh Hazlewood to Matthew Breetzke, Pushes the length up, in and around the off stump. Breetzke looks to defend it close to his body. The ball rears up a bit to catch the splice of the bat and it drops beside the strip on the off side.
42.2: Josh Hazlewood to Matthew Breetzke, Into the deck, over middle. Breetzke ducks whilst leaving the bat hanging like a periscope, but the ball passes harmlessly.
42.1: Josh Hazlewood to Matthew Breetzke, At 141.1 kph, it tails back a touch, on a length.Breetzke brings his bat out in front of the front pad and pushes it back to the bowler.
41.6: Matt Renshaw to Temba Bavuma, Shorter and on middle, Bavuma plays it down the strip.
41.5: Matt Renshaw to Matthew Breetzke, Stays full, on off.Breetzke lunges across for the block. It goes off the outer half past slip before it is cut off by the sliding backward point fielder. They cross.
41.4: Matt Renshaw to Matthew Breetzke, This is pushed through on the fuller side.Breetzke goes back to a full ball but manages to defend it watchfully.
41.3: Matt Renshaw to Matthew Breetzke, A bit quicker at 86.8 kph, fractionally short, on middle.Breetzke rocks back to defend.
41.2: Matt Renshaw to Matthew Breetzke, Slow turn off the deck, on a good length, on off.Breetzke uses the depth of the crease to deal with it.
41.1: Matt Renshaw to Temba Bavuma, Tossed up, on off. Bavuma lets the ball come on and eases the drive wide of cover for a single.
40.6: Josh Hazlewood to Matthew Breetzke, This is banged in short, around leg.Breetzke sits under it.
40.5: Josh Hazlewood to Temba Bavuma, Lands it on a nagging length, on middle. Bavuma gets up on his toes and nudges it wide of mid-wciket for one.
40.4: Josh Hazlewood to Temba Bavuma, On a length, on off. Bavuma taps it down on the off side with the bat close to the front pad. Matthew Breetzke is keen for a single, but they do not risk the run as the cover fielder is quick to charge across to his right.
40.3: Josh Hazlewood to Matthew Breetzke, Serves it full, attacking the front pad.Breetzke pushes it down the strip with a straight bat. Hazlewood gets low to his right but the ball sneaks under his hand and rolls wide of mid off, allowing a single. The lead goes up to 20.
40.2: Josh Hazlewood to Matthew Breetzke, Lands it full, on off. Breetzke leans on and plays a punchy drive to cover. A puff of dust is visible as the ball lands.
40.1: Josh Hazlewood to Matthew Breetzke, Nearly sneaked through. Full and tailing back in, on middle. Breetzke falls over a bit and he is late to get his bat down to defend. He just about manages to squeeze out an inside edge onto the front pad.
39.6: Nathan Lyon to Matthew Breetzke, Sticks to the full ball, on off.Breetzke presses forward and works it to the left of mid off for one.
39.5: Nathan Lyon to Matthew Breetzke, Quicker through the air, fuller than the previous ball, on off.Breetzke lunges across and knocks it to cover.
39.4: Nathan Lyon to Matthew Breetzke, LBW appeal! Hangs it up, does Lyon, outside off. Breetzke reaches across to smother the spin but can't reach the pitch of the ball and wears it on the pad well outside the line of the off stump.
39.3: Nathan Lyon to Matthew Breetzke, Around off, full in length. Breetzke angles the drive to cover.
Repair work being done on the ball as the umpire trims off the loose seam.
39.2: Nathan Lyon to Matthew Breetzke, Floated up, on off. Breetzke lunges and eases it between cover and mid off. A bit of yes and no but the two fielders converge to cut down the single.
39.1: Nathan Lyon to Matthew Breetzke, Around the off stump, Breetzke hangs back to deal with it but the ball is not all that short. It spins back to catch the inner half and it rolls to backward square leg.
38.6: Josh Hazlewood to Matthew Breetzke, A little too straight, a length delivery, on the pads. Breetzke helps it towards deep fine leg for a single.
38.5: Josh Hazlewood to Matthew Breetzke, Hazlewood goes full, hoping the ball will reverse but ends up with a low full toss, on middle. Breetzke can't quite cash in and pushes it tamely to mid on.
38.4: Josh Hazlewood to Matthew Breetzke, Bashes the deck, over off. Breetzke ducks under it.
38.3: Josh Hazlewood to Matthew Breetzke, Keeps the stumps in play, on a length. Breetzke stabs it down right under his eyes.
38.2: Josh Hazlewood to Matthew Breetzke, Angled in on middle, on a good length. Breetzke keeps it out from the crease.
38.1: Josh Hazlewood to Matthew Breetzke, Begins on a length, in the channel. Breetzke lunges across to block it out.
37.6: Nathan Lyon to Temba Bavuma, A bit too full, on off. Bavuma defends it out.
37.5: Nathan Lyon to Matthew Breetzke, Floated up, on off. Breetzke works it to deep cover for one.
37.4: Nathan Lyon to Temba Bavuma, Tossed up, on off. Bavuma reaches out in front and plays it with the spin in front of mid on before taking a quick single.
37.3: Nathan Lyon to Matthew Breetzke, At 91.3 kph, full and pushed through, outside off.Breetzke strides out in front and taps it through covers for one.
37.2: Nathan Lyon to Matthew Breetzke, Flatter and shorter, outside off.Breetzke shuffles across and gets on top of the bounce to defend.
37.1: Nathan Lyon to Temba Bavuma, Fired in on a length, on off. Bavuma whips it in front of mid on and hurries to the other end.
36.6: Pat Cummins to Matthew Breetzke, On the fuller side now, at the sticks.Breetzke knocks it with a straight bat to mid on.
36.5: Pat Cummins to Matthew Breetzke, On a back of a length, on middle. Breetzke has just blocked that from the crease.
36.4: Pat Cummins to Temba Bavuma, Lucky escape for Temba Bavuma! Cummins bowls an effort ball, a well-directed bouncer, around the left ear. Bavuma is better off ducking under it, but he hops and gets his hands high to fend it down. The ball climbs onto him and lobs off the glove but evades the man at leg gully. They cross.
36.3: Pat Cummins to Temba Bavuma, Out comes the bumper, it looked quicker than 134.3 kph on the speedgun, over the left shoulder. Bavuma ducks inside the line.
36.2: Pat Cummins to Temba Bavuma, Keeps it around the off stump. Bavuma is solid in defense.
36.1: Pat Cummins to Temba Bavuma, Nipping back in off a good length, outside off. Bavuma offers no shot.
35.6: Nathan Lyon to Matthew Breetzke, Floated up, on off. Breetzke reaches across to smother the spin but can't get his bat forward in time and is rapped on the front pad.
35.5: Nathan Lyon to Temba Bavuma, Dropped short, on off. Bavuma backs away and cuts it behind point for a single.
35.4: Nathan Lyon to Temba Bavuma, Well negotiated! Not a lot of turn but this jumps on the batter, on middle, slightly on the shorter side. Bavuma does well to fend it down.
35.3: Nathan Lyon to Temba Bavuma, Flighted up, on middle. Temba works it with the spin to square leg.
35.2: Nathan Lyon to Temba Bavuma, Flatter and shorter, on off. Bavuma pats it to cover.
35.1: Nathan Lyon to Temba Bavuma, An optimistic shout for LBW! Wide on off, on a good length. A puff of dust as the ball lands and spins back in sharply. Bavuma walks across the stumps and shoulders arms, letting the ball strike the pads. The ball did not seem to be turning enough to hit the stumps and the height seemed to be an issue as well.
34.6: Pat Cummins to Matthew Breetzke, Nice and tight, on a nagging length, on middle. Breetzke pats it down the deck.
34.5: Pat Cummins to Temba Bavuma, On a back of a length, on middle. Temba works it off the back foot to the right of mid on for a single.
34.4: Pat Cummins to Temba Bavuma, How's that for a response? A well-directed short ball, sharp and quick at the left shoulder. Bavuma hops to ride the bounce and fend it down but the ball keeps rising and he does well to drop his wrists as the ball flies past his left ear.
34.3: Pat Cummins to Temba Bavuma, FOUR! That is a statement shot by Bavuma. Cummins goes short but fails to get it high enough to trouble the batter. Bavuma presses back and gets on top of the bounce. He plays a controlled pull shot in front of square on the leg side for a four. South Africa's lead is now 10 runs.
34.2: Pat Cummins to Temba Bavuma, Spears it in very full, on the off stump. Bavuma gets his bat down and digs it out back to the bowler.
34.1: Pat Cummins to Temba Bavuma, Lands it on a good length, honing in on the off stump. Bavuma defends it from the crease.
33.6: Nathan Lyon to Matthew Breetzke, Pushed through, on off. Breetzke is not sure whether this will turn or not. He plays for the ball that keeps straigt and manages to dab it down on the off side by rocking back.
33.5: Nathan Lyon to Matthew Breetzke, This does not turn and keeps straight at 90 kph, on the off stump, on a nagging length.Breetzke is solid in defense.
33.4: Nathan Lyon to Matthew Breetzke, Another ball that spins back in off the footmarks. It is not all that short, around off. Breetzke goes deep in the crease to defend but is beaten by the turn and wears it on the pads.
33.3: Nathan Lyon to Matthew Breetzke, Shorter and on off.Breetzke rocks back and defends it out.
33.2: Nathan Lyon to Matthew Breetzke, This is quicker through the air, on off. Matthew pushes it to cover by pressing forward.
33.1: Nathan Lyon to Matthew Breetzke, Spinning back in off the footmarks, on a length. Breetzke lunges across to smother the spin and just about manages to eke out an inside edge as he defend with the bat close to the front pad.
32.6: Pat Cummins to Temba Bavuma, Hands on head for Australia. Angled in towards the off stump, bowled on a good length. Bavuma presents a straight bat to play the line of the ball. It straightens off the deck ever so slightly to take the outside edge but it does not carry to Matt Renshaw at first slip, who gets on his knees and collects it on the bounce.
32.5: Pat Cummins to Temba Bavuma, In and around the off stump, Temba hops back to block.
32.4: Pat Cummins to Matthew Breetzke, On a short of a length, on middle. Breetzke is caught in his crease as he brings his bat down to defend. It squirts off an inside edge down to deep fine leg for one.
32.3: Pat Cummins to Matthew Breetzke, FOUR! Lovely shot. A bit too full by Cummins, on off.Breetzke leans into the stroke with a high elbow. He does not try to overhit this one and just carreses it well to the right of mid off for a four
32.2: Pat Cummins to Matthew Breetzke, Hurls it on a good length, on off. Matthew defends it from the crease.
32.1: Pat Cummins to Matthew Breetzke, Hits the back of a length, on off.Breetzke pats it down on the off side.
31.6: Nathan Lyon to Temba Bavuma, More turn for Lyon. On the shorter side, a huge puff of dust as the ball lands, around off. Bavuma hops back and wrists it wide of short leg. Encouraging signs for Nathan Lyon.
31.5: Nathan Lyon to Temba Bavuma, Turn and bounce for Lyon. Floated up, on off. Bavuma lunges across for the block but the ball spins back sharply with bouce to take a bit of the glove onto the pads before it drops safely to the right of short leg.
31.4: Nathan Lyon to Temba Bavuma, A bit short, on middle. Bavuma goes back and stabs it down beside the strip on the leg side.
31.3: Nathan Lyon to Matthew Breetzke, Oh, that could have gone anywhere. Spinning back in sharply, not all that short, on middle. Breetzke works it away a bit uppishly but away from Matt Renshaw at short leg to his left. A single taken and South Africa are now into the lead.
31.2: Nathan Lyon to Temba Bavuma, Shorter and on off. Temba punches it to deep cover. The 100 is up for South Africa,and they have erased the deficit with 3 wickets down.
31.1: Nathan Lyon to Temba Bavuma, Flighted up, on middle and leg. Bavuma gets forward to smother the spin.
30.6: Mitchell Starc to Matthew Breetzke, Slips in a bumper, over middle. Breetzke sits under it.
30.5: Mitchell Starc to Matthew Breetzke, Pushes the length up at 147.4 kph, around off. Breetzke has a tentative prod at the ball but does well not to push at it with hard hands. The outside edge quickly goes down and on the bounce to gully.
30.4: Mitchell Starc to Matthew Breetzke, Dug in short, over middle and leg. Breetzke ducks under it.
30.3: Mitchell Starc to Matthew Breetzke, Fuller in length, pushed across the right-hander. Not close enough to make the batter play and it is an easy leave for Breetzke.
30.2: Mitchell Starc to Temba Bavuma, Into the deck, on off. Bavuma guides it to deep point for a single.
30.1: Mitchell Starc to Temba Bavuma, On a back of a length, on off. Bavuma rides the bounce and pats it to cover.
DRINKS BREAK!We could all do with a breather after an eventful few minutes. South Africa were going along nicely, with Temba Bavuma and Marques Ackerman building a solid partnership, but with the latter's dismissal, it is back to rebuilding for the Proteas. The chatter around the bat has picked up, too, with Marnus Labuschagne not shying away from giving Breetzke a piece of his mind. The intensity is rising, and this Test is serving up quite a contest.
29.6: Cooper Connolly to Matthew Breetzke, Dropped short, on off. Breetzke taps it to cover.
29.5: Cooper Connolly to Matthew Breetzke, Fuller and on off, knocked to short cover.
29.4: Cooper Connolly to Temba Bavuma. Short and on off, that is punched off the back foot to deep cover for a single.
29.3: Cooper Connolly to Matthew Breetzke, Angled in at the pads, Breetzke works this full ball to deep square leg for one.
29.2: Cooper Connolly to Temba Bavuma, Stays full, on middle. Bavuma wrists it wide of mid-wicket for one more.
29.1: Cooper Connolly to Temba Bavuma, Full and on the pads, that is flicked away but straight to the mid-wicket fielder.
28.6: Mitchell Starc to Matthew Breetzke, Into the deck again, on middle. Breetzke hops and dabs it down.
28.5: Mitchell Starc to Matthew Breetzke, On a back of a length, on middle. Breetzke has just blocked that from the crease.
28.4: Mitchell Starc to Matthew Breetzke, A bouncer now, ducked under.
28.3: Mitchell Starc to Matthew Breetzke, On a short of a good length, on middle and leg. Matthew Breetzke hops and fends it down.
28.2: Mitchell Starc to Marques Ackerman, OUT! CAUGHT! An absolute snorter by Mitchell Starc and the way Marques Ackerman was batting it was going to take something special to dismiss him.Starc bends his back and digs it in short. The ball keeps following Ackerman as he arches back. He is rushed and he cannot drop his wrists in time. He leaves his bat hanging around his chest as the ball flies past his blade before hitting the grill of the helmet and flying to slip, where Cameron Green takes the catch.Ackerman is taken aback by the blow and is unsure whether the ball brushed the bat or the glove before hitting his helmet. He has a quick word with Bavuma and, just as the clock turns to 0, he signals 'T' for a review. However, the on-field umpires reckon Ackerman has run out of time and do not allow the review to be taken.Ackerman trudges off disappointedly, stopping for a moment and turning around before crossing the boundary cushions. UltraEdge shows a spike as the ball passes the bat, so even if Marques had been allowed the review, it would not have saved him. South Africa are 95/3, trailing by 5 runs.
28.1: Mitchell Starc to Marques Ackerman, Bashes the back of a length, on off. Marques stabs it down on the off side.
Mitchell Starc is back with a change of ends.
27.6: Matt Renshaw to Marques Ackerman, Fires it in full, on middle.Ackerman drives it to long on and keeps the strike with a single.
27.5: Matt Renshaw to Temba Bavuma, Very full, on off. Bavuma digs it out through point and gets to the other end.
27.4: Matt Renshaw to Temba Bavuma, Full and around off. Bavuma flicks it with the spin but Cameron Green gets low to his left at short mid-wicket and prevents the single.
27.3: Matt Renshaw to Marques Ackerman, A bit of air given, very full, on off.Ackerman leans across and gets low to play the lap down to deep fine leg. They cross.
27.2: Matt Renshaw to Temba Bavuma, This is dropped short, on off. Bavuma rocks back and punches it through covers with one hand coming off the bat. A single is taken as the ball goes to the deep.
27.1: Matt Renshaw to Marques Ackerman, Spears it in full, on middle.Ackerman knocks it to long on for a single.
26.6: Cooper Connolly to Temba Bavuma, This goes on with the angle, full and on middle. Bavuma lunges and blocks it off the inner half.
26.5: Cooper Connolly to Temba Bavuma, First ball that has turned for Connolly. Bowled at 84.6 kph, fuller and on off. A hint of away turn as Bavuma gets forward to defend.
26.4: Cooper Connolly to Temba Bavuma, Fractionally short, on off. Bavuma cuts but picks out backward point.
26.3: Cooper Connolly to Temba Bavuma, Goes on with the angle, not all that short, on middle. Temba keeps it out from the crease.
26.2: Cooper Connolly to Temba Bavuma, Dropped short, on middle, this is pushed to mid on.
26.1: Cooper Connolly to Temba Bavuma, Sliding on with the arm, on a nagging length, on middle. Bavuma presses back and defends from the inner half of the bat.
25.6: Mitchell Starc to Marques Ackerman, This is fuller at 145.2 kph, on off.Ackerman presses forward to force the drive away. He does not quite connect well, as it comes off the bottom half of the blade. Threads it between cover and mid off. Pat Cummins gives chase and hauls it in with a side. Two runs taken and with that, the deficit is now down to 10 runs.
25.5: Mitchell Starc to Marques Ackerman, On a back of a length, on off.Ackerman is hurried again but manages to chop it down on the off side.
25.4: Mitchell Starc to Marques Ackerman, FOUR! Off the top edge, but Ackerman will take it. A rising short ball, around the right shoulder.Ackerman swivels for the pull but is rushed and the ball also gets big on him. It takes the top edge and flies down fine of the deep fine leg fielder.
25.3: Mitchell Starc to Marques Ackerman, Cranks it up at 144.5 kph, on a length. Ackerman leans on and drives it on the rise. Plays it into the ground and it bounces off towards cover, where Josh Inglis leaps and sticks out the right hand to make the stop.
25.2: Mitchell Starc to Marques Ackerman, Tailing back in at the pads.Ackerman's head falls over to the off side as he clips it to mid-wicket.
25.1: Mitchell Starc to Marques Ackerman, Begins from over the wicket with a full ball at the stumps.Ackerman leans across and checks his drive, playing it back to the bowler.
Nathan Lyon has been given a rest. Mitchell Starc returns to the attack.
24.6: Josh Hazlewood to Temba Bavuma, This is fuller, outside off. Bavuma gets a good stride in and shoulders arms.
24.5: Josh Hazlewood to Temba Bavuma, Another ball that hits the bat high around the sticker. Bavuma stands tall and blocks it out to the right of the bowler.
24.4: Josh Hazlewood to Temba Bavuma, On the fuller side at 137.3 kph, in the channel. Bavuma shuffles across and covers the off stump to make a leave.
24.3: Josh Hazlewood to Temba Bavuma, Bowled on a good length, on off. It jumps a bit on Bavuma, who takes the bottom hand off the bat handle and drops it beside the strip on the off side.
24.2: Josh Hazlewood to Temba Bavuma, Dishes out a bumper, over the right shoulder. Bavuma drops his wrists and sways away from the line of the ball.
24.1: Josh Hazlewood to Temba Bavuma, In line with the off pole, on a nagging length. Bavuma tucks it to mid-wicket from the crease.
23.6: Nathan Lyon to Temba Bavuma, Shorter and at the hips, Bavuma flicks it behind square leg. They think about the second but Cooper Connolly attacks the ball and keeps the batters down to one.
23.5: Nathan Lyon to Marques Ackerman, Full and drifting in, on middle. Ackerman plays around his front pad as he nurdles it behind square leg for a single.
23.4: Nathan Lyon to Marques Ackerman, Good stop! Very full, on off.Ackerman attempts the reverse but the ball is a bit too full for the shot. He does not quite manage to get it away. Marnus Labuschagne does well to anticipate and move to his left from slip to make a diving stop.
23.3: Nathan Lyon to Marques Ackerman, Crowd catch! Loopy ball, and Lyon keeps the line wide, expecting the batter to give him the charge. Ackerman does not shy away from the fight and dances down the track. He ends up getting too close to the ball and squeezes it out to cover.
23.2: Nathan Lyon to Temba Bavuma, Slightly short, on off. Bavuma uses the depth of the crease to tug it away towards deep square leg for a single.
23.1: Nathan Lyon to Temba Bavuma, Oh, that could have rolled back onto the stumps. At 94.6 kph, on a good length, aiming for the rough outside the off stump. Bavuma leans across and gets half-forward to block. He defends it late and that results in the ball rolling off the face of the bat but it stays away from the sticks.
22.6: Josh Hazlewood to Marques Ackerman, Attacking the stumps with a good-length ball. Marques gets right behind the line to block it out.
22.5: Josh Hazlewood to Temba Bavuma, On a hard length, on off. Bavuma rides the bounce and cuts it away through point for a single. The 50-run stand comes up, and it is greeted by applause from the home crowd.
22.4: Josh Hazlewood to Temba Bavuma, Rapped on the pads, but the appeal dies down quickly. Nip-backer by Hazlewood, on a good length, on off and middle. Bavuma once again plays down the wrong line on the block. The ball cuts back in off the deck to go past the inside edge and hit him on the back thigh. The height seemed to be an issue there.
22.3: Josh Hazlewood to Temba Bavuma, Outside off, on a length. Temba shoulders arms to let that one through.
22.2: Josh Hazlewood to Temba Bavuma, Nipping back in, on a nagging length, on middle. Bavuma is pinned on the crease. The ball jags back in to go past his defense and hits him high on the thigh pad.
22.1: Josh Hazlewood to Temba Bavuma, Around off, on a good length. Temba keeps it out with a straight bat.
21.6: Nathan Lyon to Marques Ackerman, Fractionally short, on off. Ackerman rocks onto the back foot and punches it through covers. He calls for two straight away, and they make it comfortably as Cooper Connolly tidies up in the deep. Another couple of runs ticked off the deficit, which is now down to 20.
21.5: Nathan Lyon to Temba Bavuma, Flat and short, on middle. Bavuma goes back in the crease and flicks it away through mid-wicket for a single.
21.4: Nathan Lyon to Marques Ackerman, FIFTY FOR ACKERMAN, his second half-century of the game.He came close to a hundred in the first innings but gave it away. He will be keen to make this start count and go all the way this time around. Floated up, on middle. Ackerman gets forward and pushes it down the deck. The batters wait for the ball to go past Lyon before taking the single.
21.3: Nathan Lyon to Marques Ackerman, Looped up, low full toss, wider on off. Ackerman reaches out and knocks it to cover.
21.2: Nathan Lyon to Marques Ackerman, Drifting in, full and on middle. Marques gets forward to smother the spin.
21.1: Nathan Lyon to Marques Ackerman, FOUR! Shouts of 'catch'! Marques Ackerman would have had his heart in his mouth for a moment there. Flighted up, wider on off. Ackerman shimmies down the track and is able to reach out. Slams it hard and well wide to the right of mid off for a four to move to 49.
20.6: Josh Hazlewood to Temba Bavuma, Off the edge! Hazlewood pushes the length up and succeeds in drawing the batter forward. Temba lunges ahead for the block. The ball moves away just enough off the deck to take the outside edge but since it was played with soft hands, the ball goes on the bounce to Marnus Labuschagne at second slip.
20.5: Josh Hazlewood to Temba Bavuma, Targeting the off pole, on a length. Bavuma covers the line and stabs it down with a straight bat.
20.4: Josh Hazlewood to Marques Ackerman, On a good length, in and around the off stump.Ackerman lets the ball come on and dabs it wide of point to rotate the strike.
20.3: Josh Hazlewood to Marques Ackerman, FOUR! Nicely played. Hazlewood angles it into the left-hander, on a short of a good length. Ackerman picks up the length early and swivels to get the pull away. Plays it with the angle to the right of deep fine leg for a boundary. The deficit comes down to 29.
20.2: Josh Hazlewood to Temba Bavuma, Aimed at the ribs, tucking the batter up for room. Bavuma presses up on his toes and gets his hands high to glance it down to deep fine leg for one.
20.1: Josh Hazlewood to Marques Ackerman, From around the wicket, into the deck, on off. Ackerman hops and cuts it to deep point for a single.
A change in bowling as Josh Hazlewood replaces Pat Cummins.
19.6: Nathan Lyon to Marques Ackerman, Shortish and on off, Ackerman punches it past the cover fielder and takes a quick run. Had Cameron Green collected the ball after running across to his right, it could have been a close call.
19.5: Nathan Lyon to Temba Bavuma, Bavuma reaches across to a full delivery outside off and sweeps it firmly along the ground towards deep mid-wicket. The fielder cuts it off in the deep, keeping the batters down to a single.
19.4: Nathan Lyon to Marques Ackerman, Floated and on middle, full in length, Ackerman flicks it through mid-wicket for a run.
19.3: Nathan Lyon to Marques Ackerman, Full and on off, Marques Ackerman leans forward and plays a wristy defensive shot to mid-wicket.
19.2: Nathan Lyon to Marques Ackerman, Tossed up around off, that is defended solidly off the front foot.
19.1: Nathan Lyon to Marques Ackerman, Ackerman shows his intentions early, skipping down the track in search of a big hit. Lyon cleverly drags the length fuller and targets middle, leaving the batter cramped for room as he inside-edges it towards backward square leg. Ackerman gets away with it this time, but he will need to pick his moments carefully after being stumped in the first innings.
18.6: Pat Cummins to Temba Bavuma, Cummins hits a probing length around off, and Bavuma gets behind the line to block it back towards the bowler. Cummins then shows a touch of footballing flair, keeping the ball under control with his feet before kicking it away towards covers.
Josh Hazlewood is limbering up, and he might be introduced soon.
18.5: Pat Cummins to Temba Bavuma, On a steady length around middle, Bavuma stays deep in the crease and brings the bat down in front of his body, nudging it away into the leg side with a compact defensive stroke.
18.4: Pat Cummins to Temba Bavuma, Cummins bangs it in short, targeting middle and leg. Bavuma stays back and tries to help it fine, but the ball takes the gloves and trickles down towards fine leg. They have enough time to come back for two.
18.3: Pat Cummins to Temba Bavuma, A touch full and on off, Bavuma gets his weight forward and looks to drive it straight, but the bat turns slightly in his hands. The shot loses its intended direction, rolling tamely towards mid on.
18.2: Pat Cummins to Temba Bavuma, On a length around off, angling in, Bavuma is behind the line and defends it carefully.
18.1: Pat Cummins to Marques Ackerman, A touch short and on off, Ackerman taps it down past point for a run.
17.6: Nathan Lyon to Temba Bavuma, Play and a miss! Short and wide outside off, Bavuma rocks back and throws his hands at the cut, looking to pierce the point region. The bat comes swishing through, but the ball stays just beyond his reach.
17.5: Nathan Lyon to Temba Bavuma, Loopy and full, around off, Temba defends it off the front foot.
17.4: Nathan Lyon to Temba Bavuma, Flatter and on off, defended off the back foot.
17.3: Nathan Lyon to Temba Bavuma, Shortish on middle, Bavuma plays it down to short leg.
17.2: Nathan Lyon to Temba Bavuma, LBW APPEAL! A loud shout, led by Marnus Labuschagne at slip, as Bavuma goes for the sweep. The ball is tossed up full and wide outside off, and Bavuma shuffles across to get into position but fails to make contact. The appeal has plenty of volume from only Marnus, but the impact is comfortably outside off, leaving little hope for the fielding side.
17.1: Nathan Lyon to Marques Ackerman, Floated up full around middle, Ackerman gets low and unfurls the reverse sweep, guiding it behind point into the deep. The placement is good enough for a single, and he rotates the strike with a touch of invention.
16.6: Pat Cummins to Temba Bavuma, Shortish and on off, punched off the back foot to covers.
16.5: Pat Cummins to Marques Ackerman, Short and on leg, pulled down to fine leg for one.
16.4: Pat Cummins to Temba Bavuma, Short and on middle, Bavuma hops to glance it fine but gets it off the gloves, sending it down to deep fine leg. They scamper through for a single, and Temba Bavuma brings up 4000 Test runs! A significant milestone for the South African skipper, greeted with warm applause from the crowd.
16.3: Pat Cummins to Temba Bavuma, Around off, on a length, the batter has just watchfully blocked this out.
16.2: Pat Cummins to Temba Bavuma, HUGE SHOUT FOR AN LBW! A sharp nip-backer at 140 kph, pitching on a length around off and jagging back in. Bavuma is pinned to the back foot as he tries to get his bat down in defense, but the ball sneaks past the blade and thuds into the back pad. The appeal is emphatic, but the umpire remains unmoved. Cummins consults his teammates, particularly the point fielder,before sending it upstairs. DRS time. No bat involved, and the impact is in line, but the Ball Tracking shows it sailing over the stumps. The on-field decision stays, and Australia lose another review.
16.1: Pat Cummins to Temba Bavuma, Back of a length on off, that is defended solidly off the front foot.
15.6: Nathan Lyon to Temba Bavuma, Slightly short and on off, it's bowled with a quick arm action, at 90 kph, Bavuma bunts it in front of mid on and picks up a single.
15.5: Nathan Lyon to Temba Bavuma, A looped-up delivery, full around off and drifting into the batter. Bavuma gets well forward, brings his bat down close to the front pad and blocks it with a watchful, straight-bat defense.
15.4: Nathan Lyon to Temba Bavuma, Flatter and quicker, on off, defended off the back foot.
15.3: Nathan Lyon to Temba Bavuma, Extra flight on this one, full and on off, Bavuma leans forward and defends it to the leg side. A puff of dust is visible there as the ball lands.
15.2: Nathan Lyon to Temba Bavuma, A bit short and on off, Temba Bavuma gets back and helps it to mid-wicket.
15.1: Nathan Lyon to Temba Bavuma, Fuller and on off, pushed back to the bowler off the front foot.
14.6: Pat Cummins to Marques Ackerman, Full and inviting outside off, Ackerman strides forward and leans into the drive, but the cover fielder is perfectly placed to cut it off. The stroke is well timed, but the placement is not quite there.
14.5: Pat Cummins to Temba Bavuma, Slightly short on off at 139.6 kph, Bavuma stays deep in the crease and uses soft hands to drop it into the cover region. The ball rolls into a vacant pocket, allowing the pair to sneak through for a single.
14.4: Pat Cummins to Temba Bavuma, In the zone outside off, on a good length,that is left alone for the keeper to collect.
14.3: Pat Cummins to Temba Bavuma, Pat angles a length ball into off stump, drawing Bavuma onto the back foot. The South African gets right behind the line and brings the bat down firmly, smothering any chance of the ball sneaking through. A compact, assured defense.
14.2: Pat Cummins to Marques Ackerman, Pitches it up and outside off, Marques Ackerman slices his drive through backward point and picks up a single.
14.1: Pat Cummins to Marques Ackerman, Cummins delivers it on a fuller length around off, Ackerman gets forward and defends it from the inner half to mid-wicket.
A maiden to start the session. Pat Cummins will steam in from the other end. 320 balls without a wicket for Cummins,the longest wicketless spell for Australia's inspirational leader, according to Mark Howard.
13.6: Nathan Lyon to Temba Bavuma, Flighted and on off, that is defended solidly off the front foot.
13.5: Nathan Lyon to Temba Bavuma, No run, that is flicked away but straight to the fielder at square leg.
13.4: Nathan Lyon to Temba Bavuma, A beauty from Lyon! He lands it around off and gets this one to skid straight on, offering no turn to Bavuma. The South African presses forward with his bat angled in defense, but the ball sneaks past the outside edge by the narrowest of margins. Lyon has sown the seed of doubt here.
13.3: Nathan Lyon to Temba Bavuma, Lyon gets this one to bite sharply off the surface, extracting both turn and bounce from a length around off. Bavuma shuffles across and brings his bat down to defend, but the ball grips and kicks past the blade, striking him high on the leg. A testing delivery, with Lyon finding real purchase.
13.2: Nathan Lyon to Temba Bavuma, A touch short again, around off and spinning in, Bavuma goes deep inside the crease to work it away but it hits the short leg fielder and rolls to mid-wicket.
13.1: Nathan Lyon to Temba Bavuma, Begins the session with a flighted ball, a bit short and on off, Bavuma defends it from the back foot.
We are back and ready for the final session of the day to get underway.There are 39 overs left in the day, so we are in for a two-and-a-half-hour session. Nathan Lyon will kickstart proceedings with the ball. Temba Bavuma is on strike. Lyon dismissed the Proteas skipper in the first innings. He is starting with a slip and a short leg. Off we go...
A crucial session awaits -The running between the wickets between Temba Bavuma and Marques Ackerman has been a little iffy, and that is something the two will need to sort out. Australia have been fairly disciplined with their lines and lengths in the first 13 overs.You would expect Nathan Lyon to bowl a long spell from one end after the break, with Pat Cummins and the other two pacers operating in sharp, short bursts from the opposite end. The third session is set to resume at 12.30 pm GMT, so join us then for more action from Newlands. See you shortly!
1.14 pm GMT - TEA, DAY 3 -End of another absorbing session in this Test. Australia will be happy with their work with the ball before the break, having picked up a couple of wickets, with South Africa still in deficit of 47 runs. More than the wickets themselves, the Proteas will be disappointed with the manner of their dismissals. However, Marques Ackerman's presence at the crease has helped keep the scoring rate up, and South Africa will need him to carry on after the break.
12.6: Pat Cummins to Marques Ackerman, On a good length around off, Ackerman gets behind the line and pushes it firmly towards mid off. That will be Tea on Day 3, with South Africa heading off after a session that has offered Australia plenty of encouragement, but Ackerman has had his share of escapes.
12.5: Pat Cummins to Marques Ackerman, Bangs in a bouncer, Ackerman sits under it.
12.4: Pat Cummins to Marques Ackerman, A DIRECT HIT WAS NEEDED! A fraction short around off at 143 kph, Ackerman taps it towards cover and sets off, but Bavuma takes a couple of steps before abruptly yelling, Noooooo! Ackerman slams on the brakes and turns back, stranded halfway down the pitch as Cooper Connolly gathers and takes aim at the striker's end. The throw misses the stumps, and Ackerman survives. Oh, boy! South Africa have a huge escape just at the stroke of Tea.
12.3: Pat Cummins to Marques Ackerman, Cummins goes for a bumper, around middle and leg, Marques Ackerman ducks underneath it.
12.2: Pat Cummins to Marques Ackerman, A touch short and on off, Ackerman goes on the back foot and plays it down to point.
12.1: Pat Cummins to Temba Bavuma, Shortish and on off, tapped down to point for a single.
Last over before Tea. Pat Cummins will close out the session.
11.6: Nathan Lyon to Marques Ackerman, HUGE LBW APPEAL, NOT OUT! Cummins has a quick word with Lyon before Australia decide to review the umpire's decision. Lyon comes round the wicket to the left-hander and floats it full, close to off. Ackerman strides forward to defend, but the ball skids on rather than turning appreciably and thuds into his front pad. The review is underway, and there's no inside edge to save him. However, the impact is outside off stump, so the on-field decision stands. Australia burn a review!
Review time! A vociferous shout for LBW is turned down by the umpire, but Nathan Lyon and Alex Carey are pretty convinced. After a brief discussion, Pat Cummins decides to send it upstairs. The impact seemed to be outside the line of the off stump,and the Ball Tracking confirms the same. It stays Not Out.
11.5: Nathan Lyon to Temba Bavuma, Lyon pulls his length back and drops it around off, Bavuma rocks back and punches it to the left of mid off, for a quick run.
11.4: Nathan Lyon to Temba Bavuma, Fuller and on off, breaking back into the batter, Bavuma defends it near his front leg and towards short leg.
11.3: Nathan Lyon to Temba Bavuma, Loopy off-spinner, landing full outside off, Bavuma lunges and defends it safely.
11.2: Nathan Lyon to Temba Bavuma, Again a touch short, around off, Temba stays back and turns it to square leg.
11.1: Nathan Lyon to Temba Bavuma, Tossed up, around off and a bit on the shorter side, Bavuma gets back and defends it to mid-wicket.
10.6: Pat Cummins to Marques Ackerman, Straighter in line, on a length, Ackerman tucks it to deep square leg and returns for the second run. 50 up for South Africa and the deficit is below 50 nonw.
10.5: Pat Cummins to Marques Ackerman, Cummins switches to round the wicket and lands it on a length outside off at 142.6 kph. The ball straightens just a touch after pitching, sneaking past Ackerman's defensive bat.
10.4: Pat Cummins to Marques Ackerman, Digs it in short, around middle and leg, Marques Ackerman rides the bounce and plays a well-timed pull shot. It's to the right of deep square leg and he gets two runs.
10.3: Pat Cummins to Marques Ackerman, In the channel outside off, on a shortish length, Ackerman allows it through.
10.2: Pat Cummins to Marques Ackerman, FOUR! Ackerman throws his hands at a short, wide delivery outside off, flashing hard with lightning-quick hands. The outside edge flies over the slip cordon and races away to the third-man fence. A risky stroke, but the width proves too tempting to resist. The deficit is now 53 runs.
10.1: Pat Cummins to Marques Ackerman, On a good length, around off, defended off the back foot to the off side.
9.6: Josh Hazlewood to Marques Ackerman, Short and on middle, pulled away all along the ground to deep square leg, only for a run that time.
9.5: Josh Hazlewood to Marques Ackerman, Gets behind the line of the delivery and pushes it to mid on.
9.4: Josh Hazlewood to Marques Ackerman, FOUR! A misfield gifts Ackerman a boundary. Short and around middle and leg at 139 kph, he gets on top of the bounce and pulls it towards deep backward square leg. The fielder races across to his right and slides to stop it, but the ball ricochets off his palms and trickles behind him to the fence. He tries to get back up quickly without keeping his eyes on the ball, and pays the price.
9.3: Josh Hazlewood to Marques Ackerman, Fuller and closer to off, angling in, Ackerman leans into the drive but picks out the cover fielder. No room to score.
9.2: Josh Hazlewood to Marques Ackerman, Full and well wide of off, with the ball shaping away, Ackerman leans forward as if tempted by the drive but has a careful look at the line before pulling out. Plenty of room to free his arms, but he wisely resists the invitation.
9.1: Josh Hazlewood to Marques Ackerman, Coming from round the wicket, Hazlewood bangs it in slightly short around off. Ackerman stays back and calmly drops it in front of point.
8.6: Pat Cummins to Marques Ackerman, Shortish and close to off, leaving the batter with the angle, Ackerman gets back and steers it through point for a single.
8.5: Pat Cummins to Marques Ackerman, A bouncer around leg at 139.5 kph, with leg gully in place. Ackerman reads the plan, bends low and lets it sail over him. No fuss, no theatrics.
8.4: Pat Cummins to Marques Ackerman, Full and around off, Ackerman comes halfway forward and meets it with a firm defensive push towards extra cover.
8.3: Pat Cummins to Temba Bavuma, A touch short on off and angling in, Bavuma waits on the back foot before gently steering it past point. A comfortable single brings him off strike.
8.2: Pat Cummins to Temba Bavuma, Closer to off stump this time, Cummins hits a good length and Bavuma gets onto the back foot to defend it solidly.
8.1: Pat Cummins to Temba Bavuma, Cummins starts with a length ball outside off. Bavuma shuffles across, judges the line comfortably and lets it go through to the keeper.
Change in bowling. Pat Cummins replaces Mitchell Starc at this end.
7.6: Josh Hazlewood to Marques Ackerman, FOUR! Gets it away. On a hard length, on off. Ackerman shuffles across, lets the ball come on and opens the face of the bat to glide it well wide of backward point to his right for a four.
7.5: Josh Hazlewood to Marques Ackerman, Dug in short, over middle. Ackerman ducks under it.
7.4: Josh Hazlewood to Temba Bavuma, Had to hurry! A bit fuller, on off. Bavuma drops it wide of cover and hurries to the other end.Ackerman is late to set off and is struggling to make his ground. The cover fielder swoops in and has a shy at the batting end but misses. It would have been interesting had the throw hit.
The skipper, Temba Bavuma, walks in next.
7.3: Josh Hazlewood to David Bedingham, OUT! IN THE AIR AND TAKEN! Another Proteas batter falls to the short ball, and David Bedingham, like several before him in this series, just couldn't resist taking it on. Bedingham falls to the short ball for the second time in this game. Hazlewood bangs it in short, over off. Bedingham presses back in his crease and gets his hands high to get the pull away. He cannot roll his wrists over the ball to control the shot. It gets skied off a top edge towards deep square leg, where Nathan Lyon moves to his right and settles under the skier to take the catch. He turns around and looks at the crowd, holding the ball around his eyes. It is perhaps in response to something being said by those present on the grass bank. South Africa lose their 2nd wicket, trailing by 69 runs.
7.2: Josh Hazlewood to David Bedingham, In and around the off stump, on a good length. Bedingham stabs it down with an angled bat.
7.1: Josh Hazlewood to David Bedingham, Serves it on a good length, on off. Bedingham looks to cover the line but the ball straightens off the deck to go past the blade.
Mitchell Starc is going off the field.He seems to be moving okay. Michael Neser comes on as the substitute fielder.
6.6: Mitchell Starc to David Bedingham, On a back of a length, at the hips. Bedingham turns it away neatly towards deep fine leg and takes a single.
6.5: Mitchell Starc to David Bedingham, Much better by Bedingham. Bowled on a hard length, on off.Bedingham rises with the bounce and fends it out confidently.
6.4: Mitchell Starc to David Bedingham, Nasty stuff from Starc. This is on a shortish length, climbing onto the batter.Bedingham gets into a real tangle in dealing with the short ball. He cannot drop his wrists in time and cannot sway away from the line. Ends up copping a blow on the body.
6.3: Mitchell Starc to David Bedingham, That sounded so sweet. Starc goes full again, on off.Bedingham picks the bones out of it as he cracks the drive but can't get it past the man at cover.
6.2: Mitchell Starc to David Bedingham, Beaten! The length is pulled back by Starc,Bedingham goes feeling for the ball but it leaves him to go past the outside edge.
6.1: Mitchell Starc to David Bedingham, FOUR! Beautiful shot. Slightly overpitched by Starc, going away with the angle.Bedingham leans into the drive nicely and creams it through covers for his first boundary.
5.6: Josh Hazlewood to David Bedingham, Bedingham nearly got himself into trouble there. Really full, on off. David digs it out past cover and as the ball goes into the deep, he wants to push for the second and sets off before being sent back by his partner and rightly so.
5.5: Josh Hazlewood to Marques Ackerman, Froom around the wicket now, on a length, angled into the pads. Ackerman clips it away in front of square on the leg side and gets to the other end.
5.4: Josh Hazlewood to David Bedingham, Hits the back of a length, on off.Bedingham dabs it with an open bat face wide of cover for a single.
5.3: Josh Hazlewood to Marques Ackerman, Hazlewood stays on the shorter side, on middle and leg. Marques turns it away behind square leg for one.
5.2: Josh Hazlewood to Marques Ackerman, Oh, Ackerman had to be careful there. Hazlewood goes into the deck, on middle. Marques hops and pivots on the back foot for the pull but the ball does not rise as much as he expected. It sneaks under the blade and pings him on the body before dropping to the ground and going nowhere. Ackerman was aware of the possibility of the ball trickling back towards the stumps and safeguarded his stumps.
5.1: Josh Hazlewood to Marques Ackerman, Pushed across the off stump, on a good length. Ackerman looks to defend it with soft hands. The ball leaves him to catch the outer half, and it dribbles wide of gully. They think about a single but Cameron Green is swift to his left and prevents the run.
4.6: Mitchell Starc to Marques Ackerman, A sharp short ball, around the right shoulder. Ackerman deals with it nicely, getting his bat high and dropping it beside the strip on the leg side for a run.
4.5: Mitchell Starc to Marques Ackerman, On a hard length, on middle. Ackerman fends it down from the crease.
4.4: Mitchell Starc to Marques Ackerman, FOUR BYES! That took off. Starc bends his back and digs it in short, over the right shoulder. Ackerman ducks inside the line of the ball. It keeps rising on its way to the keeper. Alex Carey moves to his right and leaps. He sticks out the right mitt over his head, but the ball clips his fingertips and goes behind into the fence. The deficit comes down to 79.
4.3: Mitchell Starc to Marques Ackerman, Cranks it up at 146.4 kph, a bit fuller, keeping the stumps in play. Ackerman leans across and brings his bat out in front as he pushes it to mid on, where Travis Head moves to his right and makes a tumbling stop.
4.2: Mitchell Starc to David Bedingham, Aimed at the ribs, on the shorter side.Bedingham presses up on his toes and nurdles it behind square leg for a single.
4.1: Mitchell Starc to David Bedingham, Very full, pushed across off at 145.4 kph. Bedingham crouches and reaches out but does not quite manage to get the drive away. Squeezes it out to cover.
3.6: Josh Hazlewood to Marques Ackerman, Pitches it up and around off, Marques Ackerman gets on the front foot and defends it solidly to mid off.
3.5: Josh Hazlewood to Marques Ackerman, A sharp bouncer around leg, Ackerman picks it early and ducks underneath it.
3.4: Josh Hazlewood to David Bedingham, Delivers it on a good length, around off, David pats it down to cover-point and rotates the strike.
3.3: Josh Hazlewood to Marques Ackerman, Fuller and outside off, forced to covers for a run.
3.2: Josh Hazlewood to Marques Ackerman, Length delivery outside off, leaving the batter with the angle, Ackerman pokes inside the line and misses.
3.1: Josh Hazlewood to David Bedingham, Outside off, on a length, it's run down to third man for a run.
This is not a good sign for Australia. Mitchell Starc limps back to his fielding position at deep fine leg and is feeling his calf. That's certainly something to keep an eye on.
2.6: Mitchell Starc to David Bedingham, Angling away on a length, the ball is met with an angled bat as Bedingham guides it towards deep cover-point. They take a single, and David gets off the mark.
Australia strike early. David Bedingham is in at number 3.
2.5: Mitchell Starc to Aiden Markram, OUT! CAUGHT! A soft dismissal for Markram, yet again it's Starc who is among the wickets! The left-armer pitches it full outside off, angling it across with a wobble seam at 151 kph. Markram gets forward to drive and makes decent contact, but the ball flies off the bat without finding the gap. Travis Head, stationed at mid-off, takes a straightforward catch this time, making no mistake after dropping Markram at cover in the first innings. South Africa lose their first wicket, still trailing by 88 runs.
2.4: Mitchell Starc to Aiden Markram, Goes fuller and outside off, Markram gets on the front foot and drives it towards mid off.
2.3: Mitchell Starc to Marques Ackerman, Shortish and close to off, 144.9 kph, Ackerman gets back and drops it with soft hands towards point. They get an easy single.
2.2: Mitchell Starc to Marques Ackerman, Starc cranks it up to 145 kph, landing it on a good length outside off. Ackerman judges the line well, leaves his bat tucked away and lets it pass through to the keeper.
2.1: Mitchell Starc to Marques Ackerman, FOUR! That's confidence from Ackerman! Short and wide at 142.7 kph, he rocks back, gets into position beautifully and cuts it crisply through point. He's an attacking batter, and anything loose outside off is unlikely to go unpunished.
1.6: Josh Hazlewood to Marques Ackerman, Length delivery on middle and leg, Ackerman wrists it down to deep fine and takes a single. Probing over.
1.5: Josh Hazlewood to Marques Ackerman, A clever change of length from Hazlewood. He pulls it back to a probing length around off and gets it to shape away. Still wary after the previous delivery, Ackerman stays on the back foot and pushes tentatively inside the line, beaten all ends up.
Halt.The physio jogs out to check on Marques Ackerman, who has taken a blow to his right hand.A bit of magic spray, and Ackerman looks ready to carry on.
1.4: Josh Hazlewood to Marques Ackerman, OUCH!Ackerman takes a blow to the body. Hazlewood bangs it in short around leg at 139 kph and gets it to climb sharply. Ackerman is caught by surprise, tries to sway out of the way at the last moment, but cannot escape the rising ball.
1.3: Josh Hazlewood to Marques Ackerman, Full and around off, driven off the front foot to mid off.
1.2: Josh Hazlewood to Marques Ackerman, EDGY FOUR! Fuller and around off, the ball seams away as Ackerman strides forward to defend with soft hands. The outside edge is found, but it flies through the vacant channel between slips and gully and races away to the fence.
1.1: Josh Hazlewood to Marques Ackerman, A lovely start from Josh. He lands it on a probing length around off and gets it to nip away off the seam. Ackerman pushes inside the line, but the movement takes it past the outside edge.
Josh Hazlewood will share the attack. A couple of members of the ground staff are out with the hammer to flatten out the landing area.
0.6: Mitchell Starc to Marques Ackerman, Short and on off at 144 kph, Ackerman gets on the back foot and taps it down to the left of gully. A quick single gets Marques Ackerman off the mark.
0.5: Mitchell Starc to Marques Ackerman, Starc fires it in at 143 kph, landing on a length around middle and off. Marques Ackerman comes half-forward and meets it with a compact defense, keeping it close to mid on.
0.4: Mitchell Starc to Aiden Markram, Short of a length around off, Markram hangs back and opens the face to guide it towards deep point. They take a single to get South Africa underway in the second innings, bringing the deficit down to 99.
0.3: Mitchell Starc to Aiden Markram, BIG LBW APPEAL! Starc sends down another sharp inswinger at 140.1 kph, pitching on a length and tailing into Markram. The batter tries to defend from the back foot but appears to get an inside edge onto his pads. The umpire remains unmoved, and Australia decide against taking the review. Height could have been a factor too.
0.2: Mitchell Starc to Aiden Markram, Starc cranks it up to 140.5 kph, landing it on a length around middle. The ball nips back into the right-hander off the surface, but Markram stays compact on the back foot and defends it safely.
0.1: Mitchell Starc to Aiden Markram, Mitchell Starc opens with a short ball around off, angling away at 139.2 kph. Aiden Markram rises onto his toes and gently steers it into the off side, keeping the shot firmly under control.